Friday 26 November 2010

Daring Bakers' Challenge - November 2010: Crostata

A little update before blogging about my DB challenge: My left hand is still recovering from the burn; it means my hand is still bandaged although not as bad as the picture in my previous post. I now have four of my fingers out of the bandage, and the bandage just goes up to my wrist instead of my arm. I still can't use my left hand normally though because my thumb is positioned in a certain way by the bandage therefore not allowing it to move. Good news is the doctor is happy with the progress of my burn, so pretty soon, I shall be back in the kitchen baking more sweets!


In the meantime, I had my H acting as my sous chef for this challenge. At first I decided to miss out on this month's challenge, but the thought of pastry cream tart alone made me salivate, so I kept on pondering how I could make it happen. Good thing my H volunteered to be my second hand, although I did have some hesitations because my H and I don't work so well in the kitchen arena. His quirks and my quirks don't mesh well in cooking/baking. I'm quite strict, focused and theoretical, while he's more easygoing and experimental. Anyway, despite all that, we gave it a go; everything worked perfectly. He was a good support; he wanted me to make most of this challenge myself, so he was just quietly watching me bake and assist on things he knows I cannot do with one hand i.e. slicing the butter into cubes, scraping the dough that has been stuck on my hand and putting in/taking out the crostata from the oven... oh, and the dishes!


Blog-checking lines: The 2010 November Daring Bakers' challenge was hosted by Simona of briciole. She chose to challenge Daring Bakers' to make pasta frolla for a crostata. She used her own experience as a source, as well as information from Pellegrino Artusi's Science in the Kitchen and the Art of Eating Well.


Crostata is basically an Italian version of a tart, but what makes it a crostata is the use of a specific sweet pastry called pasta frolla. I've become loyal with Martha Stewart's pate brisee recipe when I'm making any sorts of pies and tarts, so to try a new kind of pastry is refreshing. I have to admit that I do kind of like the pasta frolla better than pate brisee. Just a simple reminder for me to not get stuck in my own ways; always try to explore new possibilities of using something else other than what I'm used to, so I have much to thank for from this challenge.


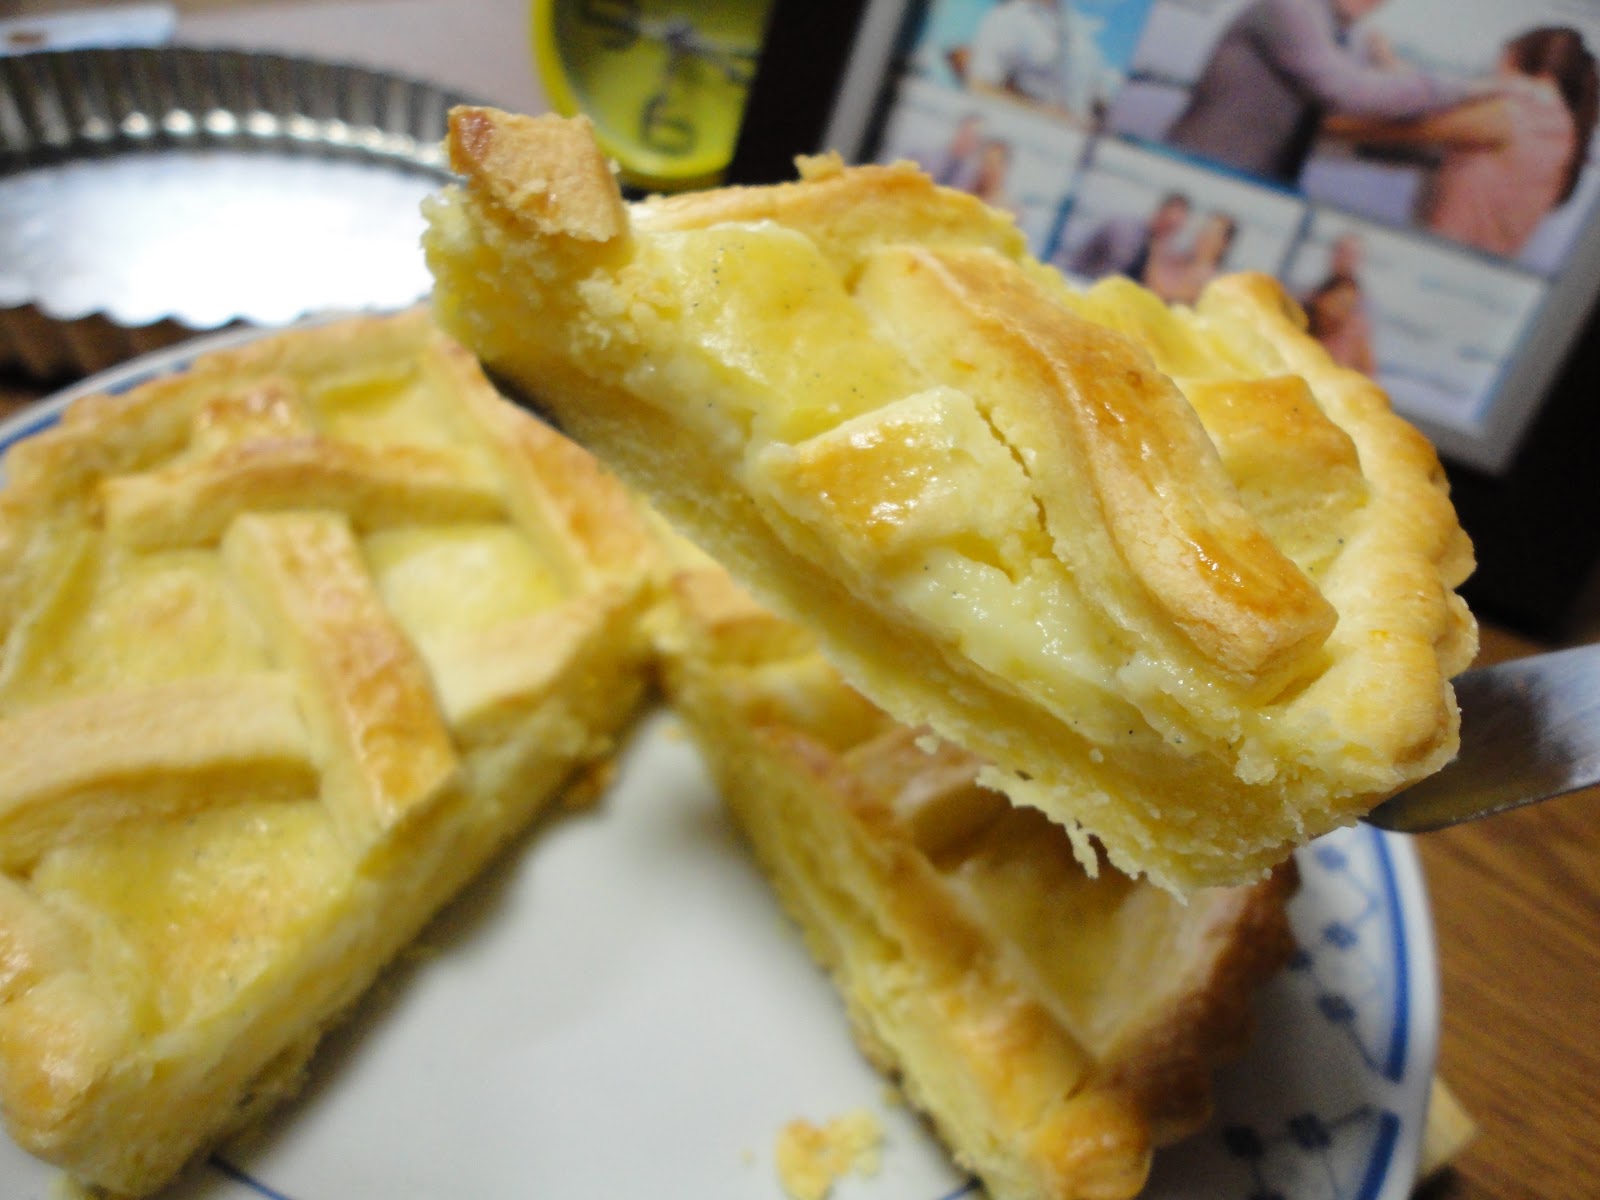
I've thought long and hard as to what filling I should make for my crostata. In the end, the most simple choice warmed my appetite - pastry cream filling; in Italy, this specific crostata is called crostata con la crema. The pasta frolla recipe that our host, Simona, gave us had lemon zest incorporated in the dough, but I decided to use the kiss of orange zest instead. As for my pastry cream, a very classic vanilla pastry cream. So could you just imagine an orange tang of crust topped off with a flow of incredibly creamy vanilla pastry cream? I say that's utter deliciousness!


Oh, I got some leftover pasta frolla dough as well as vanilla pastry cream, so I decided to make it into an empanada. Empanada is a semicircle pie with either savoury or sweet stuffing, which is popular in Spain and Portugal, as well as countries that has been colonized by both countries i.e. Philippines and most Latin countries. Anyway, my empanada was not stuffed but rather filled with vanilla pastry cream; an absolute treat.

Bisou bisou,
Charlotte

Friday 12 November 2010

Baking on Hold

Accidents do happen. Unfortunately second time around for my poor left hand... First time, burnt by a fireball that exploded from my gas oven; this time, hot wax got splattered around the skin between my thumb and index finger.


The bandage the hospital wrapped on me makes my burn look so tragic (it's not as bad as it looks), but I guess it would help give a speedy recovery. Until then, I have to pause my baking sessions... :(

Bisou bisou,
Charlotte

Thursday 11 November 2010

Banana-Coconut Centered Chocolate Mousse

I've been meaning to make this cake for the longest time; finally, I've got around doing it. I encountered this concoction from a chef who once worked at one of my favourite patisseries back home. Unfortunately, I managed to loose the copy of the recipe, so I had to search hard on memory lane as to what components are in the cake and give my own take on this creation. I'm not sure if I got everything on my cake, but regardless, the cake was fantastic!


The cake is composed of layers of dacquoise, coconut jelly, caramelized bananas and milk chocolate mousse; it is then coated with a nice blanket of white chocolate ganache, then decorated with chocolate panels and chocolate curls. Yes, it seems like it has so much flavours going on, but it does come together nicely. Imagine a chocolate banana smoothie on a cake, but a lot lot better!

Components used for this dessert treat:
Bisou bisou,
Charlotte

Thursday 4 November 2010

Mango Mousse Cake

Ok, so I have been carried away lately with fondant cakes, but I'm back to my, sort of, comfort zone. I was, at first, thinking of making some kind of chocolate banana mousse concoction dessert; however, as I was about to purchase the bananas I saw a glowing yellow bargain... mangoes! Mangoes here in Korea are really pricey, like around $3.50 for two pieces, and being a cheapskate, I'm not willing to pay for it. So when I saw the lovely offer on the reduced rack of the fruit section... I thought, "I've got to have it" - $1 for two pieces, a tad over riped, but perfectly sweet for the dessert I had in mind!


This is what I have come up with - mango mousse cake. So it's a basic mango mousse that is semi-encased with sponge cake. I had a little fun with the sponge cake by marbling some fun tropical colors that still screams 'mango' into it. For a simple finish, I just made a small flower out of sliced mangoes.


This mousse cake is really really light and refreshing; absolutely perfect to finish off a filling meal. There are two main components for this cake: the sponge cake and the mango mousse.

First, the sponge cake.
  
  1. Make a >Basic Sponge Cake Recipe<, then divide the batter into the amount of different colors you want in your cake then add food coloring in the respective batters. So in my case, three - pink, orange and yellow; note that I have more yellow than pink and orange because I wanted yellow to be the dominant color in the marbled sponge.
  2. I poured the pink, orange and yellow sponge cake batter on a stripe vertical pattern on a lined square pan. Then, I used my spatula to swirl around the batter to create the marbling effect.
  3. After baking, you would notice that the top of the sponge turns into golden brown, but don't worry. Simply use your fingers and gently rub it off, then you will see the lovely marble pattern you have created.
  4. Slice four strips from the sponge cake, this would be used to ring around the inside of your mold. Make sure to measure how thick you want your strips to be. I had mine measured two-thirds of the height of my mold. Place the sponge strips inside each mold.
  5. Cut out circles from the remaining sponge cake to serve as base of your cake. I used the sponge-lined mold to use as a guide for the size of my circle base.
  6. Now you have your sponge case ready to be filled with mousse. Cover the molds with cling, and put them in the fridge while you make your mousse. 

I used to think making mousse is the most complicated thing ever, because when you read recipes of it, it's usually very long. As I make mousse desserts more often, it occurred to me that it's actually quite simple. Like there would be different ratios or mix of ingredients in different recipes as well as different procedures, but when you come down to it, it has almost like a 'generic' way of making a mousse. You just need a lot of mise en place (having all the ingredients needed prepared and set in place) to do.

I have made a mini documentary of how I made my mango mousse, and hopefully I can translate to you how I perceive making a mousse. For me, mousse is a four part dessert: part 1 - whip yolks and sugar, part 2 - add the flavour of your choice and gelatin (if your using), part 3 - fold in the whipped egg whites and part 4 - fold in the whipped cream; et voila! It is simple when you look at it that way right?

Anyway, here's a more detailed guide. For this mango mousse, I opted not to use gelatin.

  1. Mise en place. In picture number 1 there are four bowls, clockwise from top bowl, 2 egg yolks with 34 g sugar, 2 egg whites with 15 g of sugar, 150 g mango puree and 90 ml whipping cream. Now you're ready to whip and fold, whip and fold, whip and fold!
  2. Place everything aside on room temperature except for the cream, put that in the fridge. Get the bowl with the egg yolks and sugar, and place it on top of simmering water. Whip until thick and light in color (ribbon stage).
  3. Mix in the mango puree. If you're using gelatin, this is the part where you add it in as well. Remove from simmering water. Set aside.
  4. Whip the cream, and return it back to the fridge. The reason why I whip the cream before the egg whites is because egg whites deflate faster, so I want to whip the whites as close as possible to when I will use it.
  5. Stir the egg whites with sugar on top of simmering water until the egg whites are warm to touch. Remove from simmering water.
  6. Whip the egg whites until soft peaks form.
  7. Fold a third of the egg whites into the egg yolk-mango puree mixture. The purpose of this step is to lighten the yolk mixture to give it a closer consistency to the rest of the egg whites.
  8. Fold in the rest of the egg whites. Notice I use a whisk to fold, this is just my preference; I find that it incorporates mixtures faster than using spatula. 
  9. Fold in the whipped whipping cream.
  10. Voila, mousse is ready!
 Now that the mousse has been made, it's now time to fill the sponge cakes.


Clockwise from top left picture:
  • Fill the sponge-lined molds with the mango mousse; level the mousse to the top of the mold using an offset spatula to give a smooth finish. (Try to fill the molds neatly, don't be messy like me..) Cover in cling film, and let it chill overnight or until it's set.
  • Once it's set, Take of the cling film. One by one push the bottom of the cake gently to unmold. I used the help of my rolling pin to give a flat support in pushing up my cakes.
  • Voila, the cake can be served as it is or you may add finishing touches. 

These dainty creations really made me happy. It looked good and definitely tasted good! I'm in bliss to have found those mangoes. I've never really yearned for mangoes even if it is a very common fruit from where I grew up, but I guess not having it readily available made me miss them.


I got some left over mousse, so I just filled them on a wine glass and topped it off with a flower made from the rest of the mango slices.

Components used for this dessert treat:
Bisou bisou,
Charlotte

LinkWithin

Related Posts with Thumbnails